Contact Us

Exclusion Standards & Pro Tips

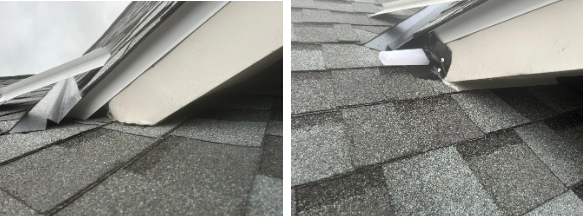
Bat Door

Standards

  • Locate the main entry point(s) the bats are using to exit/enter the structure.
  • Attached a custom made or manufactured bat door with the use of screws and sealant.
  • When possible, look into the attached door to make sure it is attached over the entry and unobstructed.
  • Ensure that the door is attached in a slight downward angle to allow easy exit. Never at an upward angle as it will prevent the bats from exiting.
  • Make sure the bat door is sealed tight and no other gaps will allow them re-enter around the door.
  • Hang door so the end is not touching any substrate that would allow bats to re-enter.
  •  Create a follow-up work order and remove after the proper amount of time has passed to allow all to exit.

Pro Tip

  • Follow state laws, recommendations, and guidelines for when to use and remove bat doors.
  • If sealant won’t be cured before bats attempt to exit the structure, use of backer rod or metal on both sides of the bat door to prevents bats from exposure to uncured sealant.

Bird Nest Removal

Standards

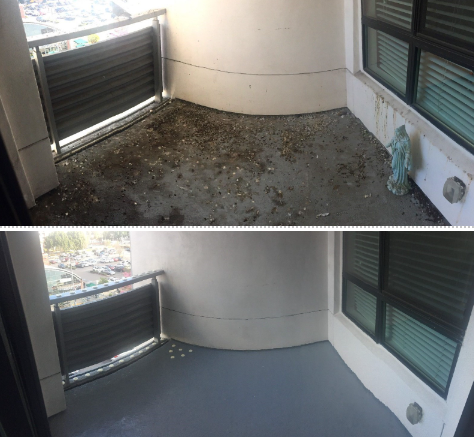
  • Remove ALL accessible nesting material, eggs and carcasses. 
  • Remove ALL damaged insulation. Vacuum the area clean.
  • Apply disinfectant and deoderizer to the area.
  • Re-insulate the area to match existing insulation

Pro Tips

  • Thorough inspection to determine what removal equipment is necessary. 
  • Hand removal will require bagging. Make sure the bags will fit out of the attic access.
  • Steri-fab will kill bird mites on contact. Large infestations may require a residual pesticide application.

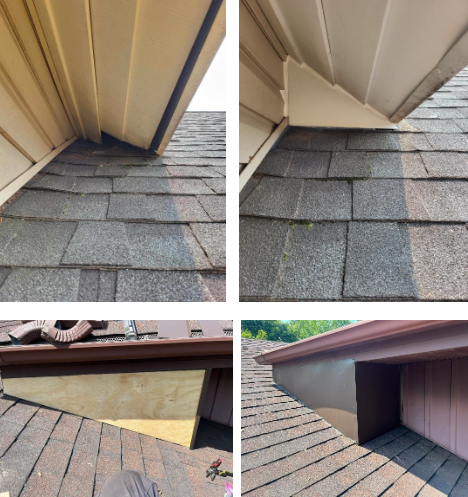
Box Out

Standards

  • Clean area prior to installation.
  • Measure where the front of box out will be placed, add 2 " to each side for screw tabs and hemming.
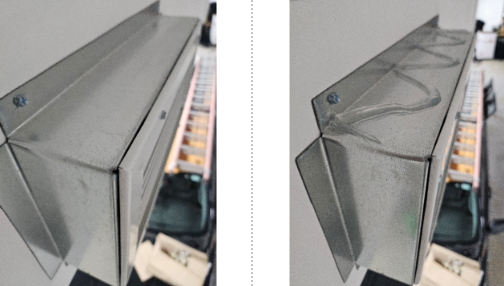
  • Bend the front with a minimum of 1" bend inward at 90 degrees or hemmed. Leave both sides at 90 degrees as this will be a screw tab. Top and bottom can be left at 90 degrees or hemmed. 
  • Insert and attach the front into the siding by screwing into the screw tab.
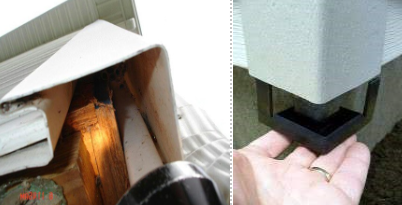
  • Measure and cut side piece. Add 1 " inward bend to follow the contour of the roof at the bottom. The top should be slid under the gutter or drip edge.
  • Attach with color matching screws and seal with color matching caulk. Use Windex solution to keep caulk lines even and clean. Weep holes can be added to the bottom front for water drainage as needed.
  • Coil stock should be cut evenly and attached without bubbles, waves or bends in the coil stock.
  • Clean up extra material from the work area, gutters and ground.

Pro Tips

  • Long extension helps reach the inward screw tabs.
  • Pay attention to water flow and make sure all gaps are caulked.
  • Inward bends makes the box out stronger and looks cleaner than outward bends.
  • Use wood as a backer to increase strength if possible.
  • Cut and bend material ahead of time or on-site with a 4’ mini break.

Buried Wire

Standards

  • Lay out a tarp next to the dig area to pile soil onto. 
  • Dig up any small plants that will be replanted upon completion. 
  • Cut sod into strips to replace after installation. 
  • Rake and pile any mulch or stones to replace after installation. 
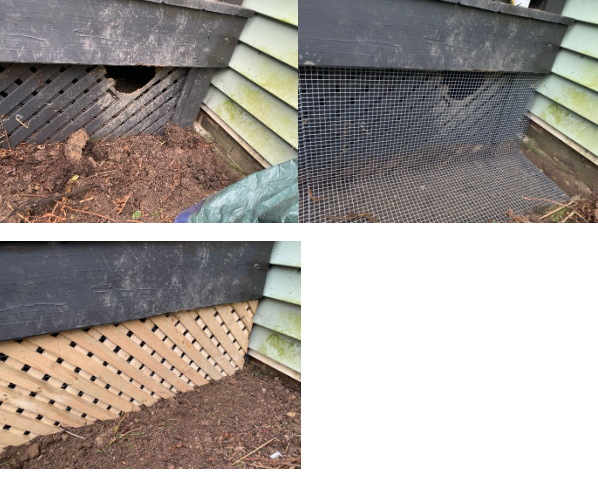
  • Remove lattice or trim board, if necessary. 
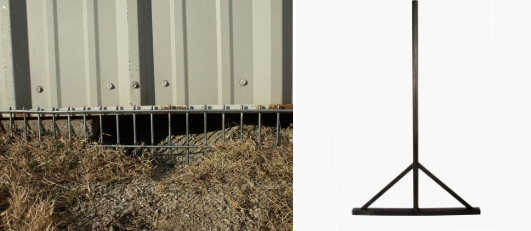
  • Dig a square trench roughly 12” deep by 12” when possible. This allows for future landscaping plantings without hitting the wire. 
  • Cut and bend the wire 90 degrees to fit into trench.  
  • Align the wire and attach it evenly to the structure with screws and washers. Attach wire as low as possible while maintaining a solid anchoring point. 
  • Overlap panels no more than 2” and tie wire or J clip seams together. 
  • Replace lattice or trim board, as needed. 
  • Once wire is in place, backfill soil back into the trench and compact it down. 
  • Rake soil back to the original grade, do not bury boards unless they were originally underground. This will cause them to rot. 
  • Replace sod, plants, and any landscaping materials back to the original state. 
  • Clean up the area and remove the tarp along with any unwanted debris. 

Pro Tips

  • Call 811 to identify buried utility lines. Check for sprinkler lines and landscape lighting. 
  • Use poly-coated wire for visible repairs and standard wire for a true buried wire. 
  • Watering dry soil can make digging easier. 

Caulking with Backer Rod

Standards

  • Clean and remove loose debris. 
  • Insert appropriate size and style of backer material securely into gap. 
  • Leave space for the caulk to be applied flush with substrates edge. 
  • Choose the best color to blend into the structure. 
  • Apply caulking to the area, making sure to adhere it to the backer and the substrate, make sure to cover entire backer material with caulk. 
  • Finish by tooling the caulk across application area with wet finger, with Windex and Dawn dish soap mixture. 
  • If necessary, use texturing tool to blend better. 
  • Clean up any excess/ unwanted caulking from the area.  
  • Never wipe excess caulking off onto the structure. 

Pro Tips

  • Have rag handy to clean off excess caulking.  
  • If caulking ends up in unwanted areas, it may be better to wait until it dries before removing. 
  • If you need to remove immediately, use WD-40 and a rag. 
  • Always store caulk in a climate-controlled area. 
  • Never use a knife blade to push in backer material. A long screwdriver works well.  

Caulking with Excluder

Standards

  • Clean and remove loose debris. 
  • Insert Excluder material securely into the gap. 
  • Leave space for the caulk to be applied flush with substrates edge. 
  • Choose the best color to blend into the structure. 
  • Apply caulking to the area, making sure to adhere it to the Excluder and the substrate, make sure to cover all of the Excluder with caulk. 
  • Finish by tooling the caulk across application area with wet finger, with Windex and Dawn dish soap mixture. 
  • If necessary, use texturing tool to blend better. 
  • Clean up any excess/ unwanted caulking from the area.  
  • Never wipe excess caulking off onto the structure. 

Pro Tips

  • Have a rag handy to clean off excess caulking.
  • Wear work gloves.
  • If caulking ends up in unwanted areas, it may be better to wait until it dries before removing. 
  • If you need to remove it immediately, use WD-40 and a rag. 
  • Always store caulk in a climate-controlled area. 
  • Never use a knife blade to push in Excluder. A long screwdriver works well. 

Chimney Cap

Dig DeFence

Standards

  • Check area for impenetrable objects. Remove as needed. 
  • Drive panels flush with structure by using the Installation tool to prevent bending panels.  
  • Make sure all panels are driven uniformly and no gaps are present between panels. 

Pro Tips

  • Call 811 to locate utility lines and identify sprinkler lines. 
  • Prongs can be cut with a bolt cutter, to fit around tree roots or rocks to maintain even installation. 
  • Dig DeFence can be installed in places where buried wire cannot. 

Drip Edge

Standards

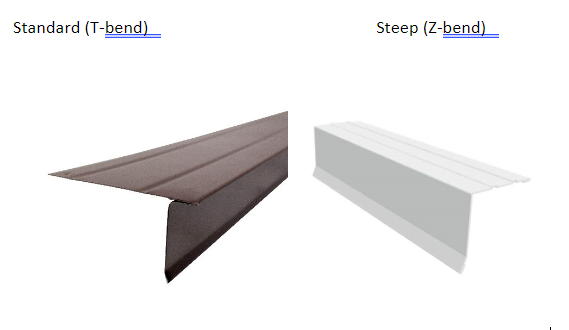
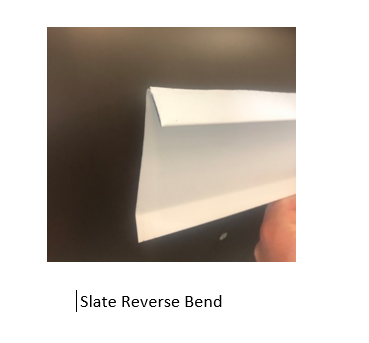
  • Determine which drip edge style is needed: Standard, Steep or Slate.
  • Bend drip edge to chosen style as shown above.
  • Install the drip edge by sliding it under the shingles. 
  • For slate the hemmed bend is outward, only on a slate the bend can be outward. 
  • Secure with appropriate color matching screws. 
  • When possible, drip edge should be attached to roof sheathing under the shingles. 
  • If not able to attach under the shingles, screws should be placed above the gutter spikes. Avoid screwing into a gutter below the gutter spikes as this can cause damage/leaks. 
  • If attaching above gutter spike to fascia, secure with appropriate color matching screws. 
  • Overlap each piece 2”-3” and into the gutter a minimum of 1”. 
  • Corners should be wrapped with one piece, cut to fit. Avoid seams on corners as the chance of animal re-entry is high at corners. 
  • All styles of drip edge must include a drip lip at the bottom. 

Pro Tips

  • Keep in mind the length of your precut drip edge, longer pieces are harder to install. 
  • Hemming the top edge and/ or drip lip will add strength. 
  • Long extension bit will help anchor screw in tight gutters. 

E Caps

Standards

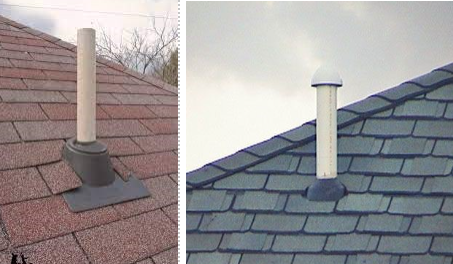
  • E Cap is installed with a PVC adhesive. 
  • Paint to match the vent stack. 

Pro Tips

  • Paint before installing or use cardboard to prevent overspray on boot and shingles. 
  • Include E Cap on every exclusion proposal.

Foundation Vent Guard (FVG)

Standards

  • Installed level to foundation. 
  • Attach frame with tap con screws. 
  • Use black screws to attach screen cover to frame. 
  • Any additional gaps or cracks around the frame should be sealed using the appropriate exterior sealant.  

Pro Tips

  • Use a level, not your eye.  
  • Do not overtighten fasteners.  
  • Make sure frame stays square throughout installation or screen cover holes will not align.  

Gable Vent

Standards

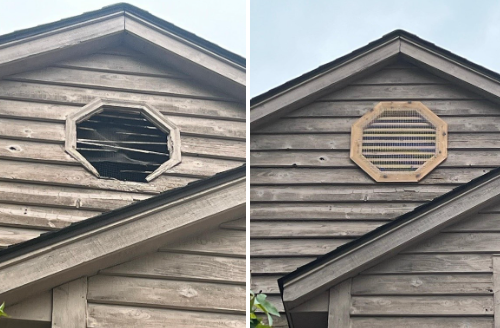
  • Repair damage, straighten louvers, or replace the gable vent prior to installation.   
  • Remove all nesting material, debris, and droppings from vent before installation.  
  • Paint to match prior to installation. 
  • Pre-drill wooden louvers or frames to prevent splitting or cracking.  
  • Cut and install 1/2" x 1/2" 20 gauge or heavier hardware cloth to completely cover the vent.   
  • Make sure the screw patterns are symmetrical.
  • No waves or ripples in material.
  • For a multi-piece installation, make sure material has proper overlap of 1/2"-1".
  • Use color matched screws.
  • Trim to clean line and do not leave fringe. 

Pro Tips

  • Angle fasteners away from each other to pull tight.  
  • Install screws in same direction (clockwise, counterclockwise), to prevent waves or bubbles in material.  
  • Measure, cut and paint ahead of time.  
  • Trace material using sharpie to ensure straight cuts.   
  • Large vents may require two pieces and two people to install. 

Garage Door Rodent Guard

Standards

  • Using the alcohol swab provided, clean existing seal where guard will be installed. 
  • Place metal over door seal with holes facing inward and tapered portion on top (there are left and right-side seals in each kit). 
  • Using seaming pliers, crimp the seal in place. 
  • Apply tape to the top portion where the metal overlaps the garage door seal. 
  • Repeat steps for each side. 

Pro Tips

  • Before installation, paint guards with proper color for aesthetics  
  • Use smooth faced pliers to avoid tool denting or scratching the guards. 
  • This can be used in conjunction with door sweeps and additional coil stock patches to fully prevent rodent entry. 

Insulation

Standards

  • Remove all accessible damaged insulation, droppings, and debris. 
  • Inspect wiring for damage from chewing. Notify customer of any damage prior to re-insulating as repair work may need to be done before insulation is placed. 
  • Install new baffles if needed. Insulation can never close off soffit ventilation. 
  • Can lights, bathroom fans, junction boxes need to be covered. 
  • Attic hatch needs to have support installed to prevent insulation from falling in to living space when opened. 
  • Apply disinfectant & deodorizer to attic space. 
  • Insulation needs to be installed evenly and level. 
  • R-value needs to exceed minimum building code. 
  • If capping, match the existing insulation type or ask the customer if they prefer to cap over fiberglass with cellulose as it is a better insulating material. 
  • If removing all insulation, new cellulose insulation should be installed as it is a higher quality, better insulating material. 

Pro Tips

  • Thorough inspection will help set you up for success. 
  • Look for trip hazards. 
  • Rulers should be used to ensure proper depth and help keep the entire attic even.  
  • Check the weather and schedule insulation work for cooler days to help prevent overheating while working in attics.  
  • Drink plenty of fluids during insulation jobs. 

Kritter Caps

Standards

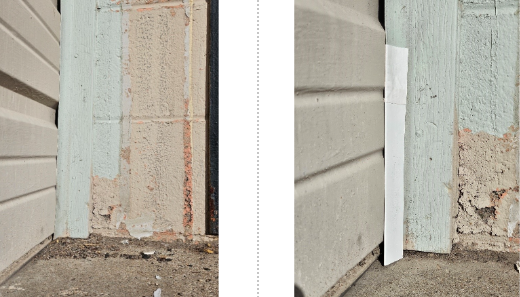
  • Install Kritter Cap up to siding corner to determine proper size. 
  • Either snap or snip off tabs to fit desired corner, test fit the cap. 
  • Remove additional tabs as necessary, cap should fit with no gaps. 
  • Apply a small amount of clear sealant to the side of cap and slide into siding corner until it stops, check fit with inspection mirror. 

Pro Tips

  • The front facing camera setting on your phone can act as an inspection mirror. 
  • Color matched screws can be used to hold cap in place. 

Louvered Vent Guard (LVG)

Standards

  • Repair damage, straighten louvers, or replace the gable vent prior to installation.  
  • Remove all nesting material, debris, and droppings from vent before installation. 
  • Pre-drill wooden louvers or frames to prevent splitting or cracking. 
  • Cut and install LVG to completely cover the vent.  
  • Make sure the screw patterns are symmetrical. 
  • LVG material installed with no waves or bends in it. 
  • For a multi-piece installation, make sure material faces the same direction and has proper overlap of ½” – 1”. 
  • Pick the color that best matches the structure. 
  • Use color matched screws. 

Pro Tips

  • Angle fasteners away from each other to pull tight. 
  • Install screws in same direction (clockwise, counterclockwise), to prevent waves or bubbles in material. 
  • Measure and cut ahead of time. 
  • Trace material using sharpie to ensure straight cuts.  
  • Large vents may require two pieces and two people to install.  

Magnetic Vent Covers

Standards

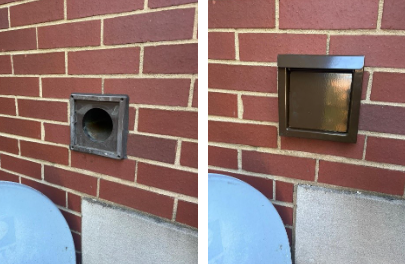
  • Completely remove the existing vent cover, framing and sealant materials exposing the vent pipe.
  • Remove ALL of the accessible nesting material and lint. 
  • Disinfect and deoderize the vent. 
  • Attach the magnetic vent cover to the existing pipe with foil tape. The existing pipe attaches into the new vent cover. This helps prevent lint accumulation.  
  • Make sure vent cover is tight to wall and level.
  • Caulk the top of the vent cover to prevent water intrusion. Caulk other gaps as needed.

Pro Tips

  • Use duct crimping tool to allow existing pipe to fit inside of the magnetic vent cover. 

Metal Patch

Standards

  • Clean area prior to installation.
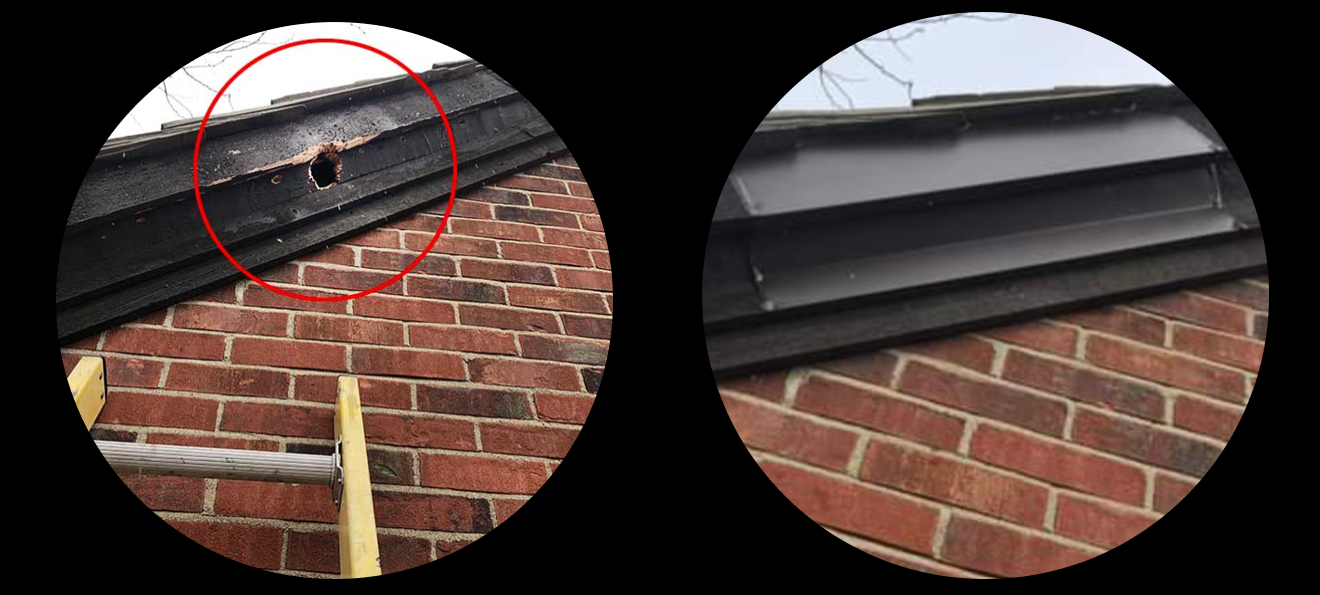
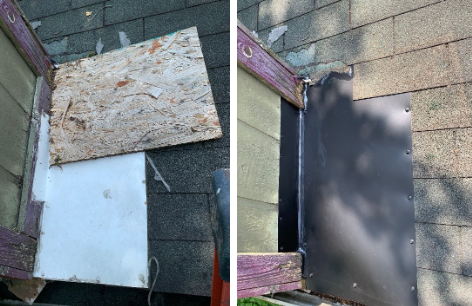
  • Replace damaged or rotten wood. Locate solid wood to anchor into.
  • Color matching coils stock, screws and caulking should be used.
  • Cut material to cover a larger area than the damaged spot.
  • Bends should be added to wrap the entire area.
  • When possible, patches should be made from one piece of metal.
  • Hem edges to strengthen the material.
  • Attach so there are no bubbles, waves or bends in coil stock.
  • Use color matching caulk to seal all edges of the metal to the structure to prevent water and animals from pulling it off.
  • Make sure no gaps are left anywhere near the coil stock patch and surrounding area.
  • Clean up extra material from the work area, gutters and ground. 

Pro Tips

  • Measure twice and cut once. 
  • Angle crews in opposing directions to help eliminate ripples. 
  • Place unpainted screws where caulking will go to hide them. 
  • Avoid over tightening fasteners.

Optical Gel

Standards

  • Clean and sanitize the area thoroughly to remove all droppings, nesting material, dirt, and pheromones with Dissolve-It.  
  • Identify the attachment method (magnetic, adhesive, CLIQ holders). 
  • Identify whether birds are nesting or roosting and place discs the proper distance apart per manufacturers guidelines. 
  • Place discs and remove caps. 

Pro Tips

  • Wear nitrile gloves when handling discs. 
  • Optical Gel loses effectiveness faster in direct sunlight. 
  • Deters birds by sight, smell, and touch. Birds see smoke/fire. 

PiGNX

Standards

  • Remove all droppings, dirt, debris and sanitize application surface. 
  • With a caulking gun, apply PiGNX to roosting/loafing areas in a zigzag pattern, applying 1 oz per linear foot. Straight line application can cover 2 linear feet per ounce. 

Pro Tips

  • Always wear nitrile gloves during application or handling. 
  • Avoid skin contact, wash with soap and water for if accidental contact occurs. 
  • For temporary applications, apply PiGNX to coil stock or another removable item and place in desired area. 

Raccoon Cap

Standards

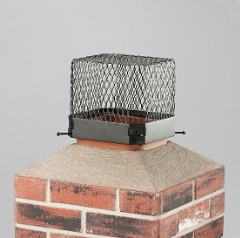
  • Make sure the proper size is installed. 
  • Installed cap should be level. 
  • Tighten the 4 screws for a snug fit. 
  • Always use a bolt on cap, do not use a friction fit with cap. 

Pro Tips

  • Keep drill on a tool lanyard. 
  • 3/8th nut drive required for installation. 

Raccoon Ridge Guard

Standards

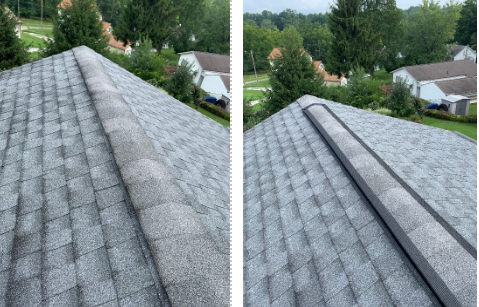
  • Raccoon Ridge Guard panels are installed to cover the ridge cap between Ridge Guard. 
  • Never screw into the ridge cap. It is secured by properly installing Ridge Guard. 
  • Install all panels with the same direction of the perforation cuts, for the best aesthetic look possible.  
  • Overlap minimum of a ½” and a maximum of 2.” 

Pro Tips

  • Two people make installation easier. 
  • Install one side of ridge guard completely before installing the Raccoon Ridge Guard.  
  • Gloves are recommended as you will be sliding the material in place.  

Ridge Guard

Standards

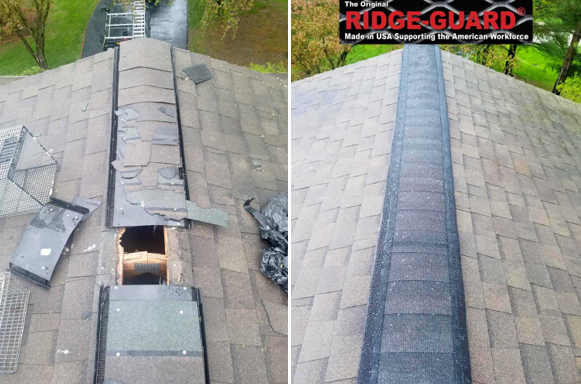
  • Clean leaves and debris from ridge vent edges before installation. 
  • Ridge Guard screws must be used.  
  • Screw pattern should be every 12”-18”. Anything over 18” is not acceptable.  
  • All ends need wrapped in ridge guard. The installation of the ridge vent will determine the method used to wrap the ends.  
  • ½” - 2” overlap of material on runs. 
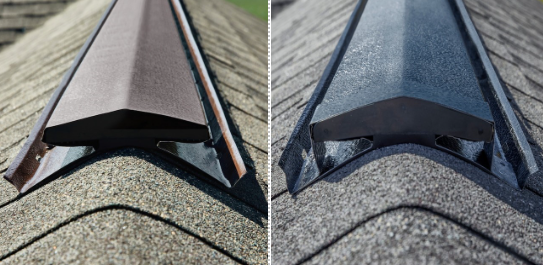
  • Ridge guard should be installed by applying pressure on the rise and run for proper fit. 
  • Screw tab should be in direct contact with shingles. 
  • Form the ridge guard to the shingle cap using a rubber mallet if gaps are present.  
  • If a screw is stripped or doesn’t grab decking, back the screw out and apply sealant to the hole and reinstall the screw. 
  • If ridge guard needs to be removed due to improper installation: remove the screws, apply sealant to the hole, smooth sealant, and apply shingle grit over sealant.  

Pro Tips

  • Never screw into ridge cap 
  • Use low profile ridge guard on lower profile ridge vent.
  • Use a bristled brush to clean vent (available from the warehouse).

Ridge Vent Ends

Standards

  • AIR VENT end plugs can be used to cap aluminum ridge vent ends. 
  • Slide plug into place and attach with 2 color matching screws placed on each side at the top. 
  • Custom made perforated metal (Pest Block/Sign Wrap) can be installed as a chew proof option. 
  • Never smash down and screw these shut. 

Pro Tips

  • Economical choice to prevent animal entry. 
  • These are not chew proof but are effective once target animals have been removed. 

Video

Ridge Vent Replacement

Standards

  • Damaged or aluminum ridge vents can be removed & replaced with a new ridge vent and cap shingles. 
  • New ridge vent and cap shingles should be installed in a straight line. 
  • New cap shingles should be installed so that the prevailing wind direction (W, NW) does not lift the cap shingles. This can be accomplished by starting at the opposite end of the ridge, installing towards the prevailing wind direction.  
  • New cap shingles should closely match existing roofing shingles. 
  • There should be no exposed nail heads. 
  • Ridge Guard should be installed once new ridge vent has been installed. 
  • All debris must be cleaned up and removed from the job site. 

Pro Tips

  • Lay a chalk line to help maintain straight line for installation. 
  • Cover exposed nail heads with sealant.  

Soffit Vent

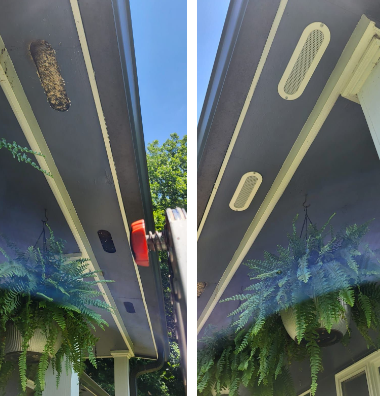
Standards

  • Remove any accessible nesting material and debris.
  • Pest Block, Sign Wrap or hardware cloth can be used.
  • Install vent or vent cover level/square with surrounding construction. 
  • Keep screw patterns even.
  • Make sure vent cover is tight and not bubbled or wavy.
  • Make sure there are no  gaps around vent cover.
  • Use color matching material or paint hardware cloth to match the trim or soffit.

Pro Tips

  • Take measurements and pre-make patch if you are able. 
  • Perform a thorough inspection to determine proper count and material/tools needed. 

Solar Panel Exclusion

Temporary Patch

Standards

  • Coil stock or hardware cloth can be used to prevent animal re-entry for 30-days.
  • Install exclusion material like a normal repair. Caulk may not be necessary.
  • Metal/caulking should be used when water damage is occurring.
  • Make sure any metal used does not cause or increase water damage.
  • Make best attempt to match and make aesthetically pleasing.  

Pro Tips

  • Use scrap material when possible. 
  • Always carry material on truck 
  • Explain to customer and reiterate to make sure they understand this is not a permanent fix and additional repairs are still needed. Leaks may still be active.  

Vapor Barrier

Standards

  • Make sure all debris is removed prior to installation of the new barrier. 
  • Cut and roll up old vapor barrier into small easily to carry sections.
  •  Level out the area with a rake.
  • Disinfect and deodorize the area.
  •  Make customers aware of any water issues, if repairs are needed allow them to be done before the new barrier is installed.
  • If wet, let the crawl space dry out before installing the new barrier. May be over-night.
  • Beginning at one side, lay down 6-mil or thicker polyethylene plastic and roll out over area.
  • Overlap seams by a minimum of 12”, securing seams with poly PVC tape.
  • Around the perimeter of the crawl space, plastic should be extended up the walls a minimum of 6” and attached with double sided tape. For interior supports, cut the plastic to fit around and tape in place. You can add small pieces of plastic to seal any gaps to ensure a full barrier.

Pro Tips

  • Multiple techs will make this easier.
  • Thorough inspection will help with easy installation. 
  • Measuring ahead of time will help calculate material.
  • Tyvek suits will help keep uniform clean.

Wedge Patch

Standards

  • Clean area prior to installation.
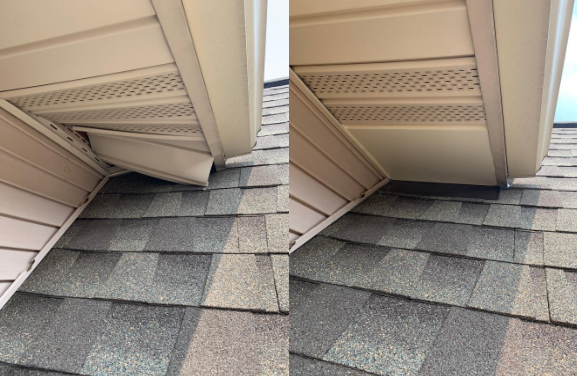
  • Install with color match metal, screws and caulk.
  • Hem Top and bend upward to fit into front soffit channel.
  • Hem bottom shingle tab and bend outward to match roof pitch. Shingle tab should be less than 2” 
  • Cut metal and install into the J- channel, side into place until the patch hits the shingles. 
  • Make sure no gaps are left exposed. 
  • Place 2 screws in the front of wedge patch into the soffit.  
  • Caulk wedge patch into place, a weep hole can be left in bottom. 

Pro Tips

  • Measure twice and cut once. 
  • Measure during inspection and note “location notes” with size and color needed.  
  • Angle crews in opposing directions to help eliminate ripples. 

Hat Vent Cover

Standards

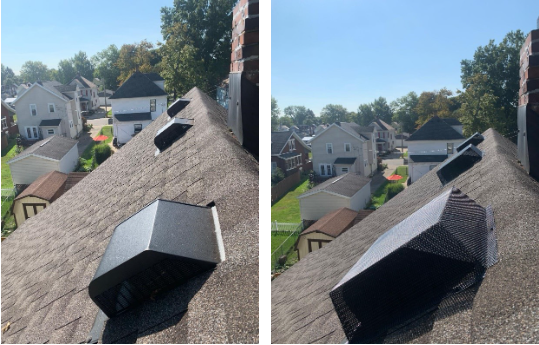
  • Be sure to square each vent cover with hat vent before installing screws. 
  • Square according to the hat vent, not the shingle line. 
  • Install screws in each corner minimum of 4, maximum of 8.
  • Install screws in tar line of overlapping shingle. 
  • If gaps exist at the shingle tab, hit with rubber mallet to ensure a tight fit. 
  • Ridge Guard screws provided MUST be used. 

Pro Tips

  • Use a tool lanyard for your drill. 
  • Rubber mallet can be used to form edges along shingle lines. 

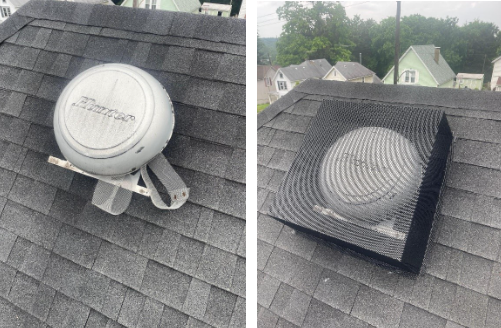
Power Fan Cover

Standards

  • Be sure to square each vent cover with power fan vent before installing screws. 
  • Square according to the power fan vent, not the shingle line. 
  • Install screws in each corner minimum of 8, maximum of 12 
  • Install screws in tar line of overlapping shingle. 
  • If gaps exist at the shingle tab, hit with rubber mallet to ensure a tight fit. 
  • Ridge Guard screws provided MUST be used. 

Pro Tips

  • Use a tool lanyard for your drill. 
  • Rubber mallet can be used to form edges along shingle lines.